LiveRC's very own, Erik Jensen, has been hard at work lately on a very unique and unusual project. The project of choice (this time) for Erik was creating a front brake system for a 1:10 2wd offroad vehicle. With some serious ingenuity and long hours, this is his creation!
Why front brakes on a 1/10th scale rear-wheel drive(RWD) vehicle when most, if not all of the sanctioning bodies have rules in place that prevent their use? I was bored. The local club has an open rule book. And because it was possible and if done right has some really good potential. It’s also something I’ve wanted to do for a long time and properly this time. Yes, I’ve tried front brakes in the past. Let’s just say it involved a servo, music wire, dish wheels put on backwards and a small chunk from a foam tire for a brake pad. I tell you what, it worked great as long as the wheels where straight. But that was 20 some years ago and things have changed that make something of this complication much easier to do. And so I did!
Why did I choose to use a Team Durango DEST210R? Mostly because that’s what I had. I bought the truck in February of 2013 with just 5 days to get it built so I could race it that weekend. However my kit was short 2 of the angled ball cups required on one end of each of the turnbuckles. I realized this short coming too late to get the proper ones so I used straight ones on the front outer camber link instead. I did not notice at the time that at nearly full steering throw the outside wheel would rub on that ball cup causing excess drag or braking if you will. The truck handled awesome! This rubbing on the ball cup was pointed out to me by another racer after the first round of qualifying. This explained why I could throw the truck into a corner hard, stab the brakes(rear only) and it wouldn’t over rotate or do anything I didn’t expect. That renewed my interest into the front brake idea.
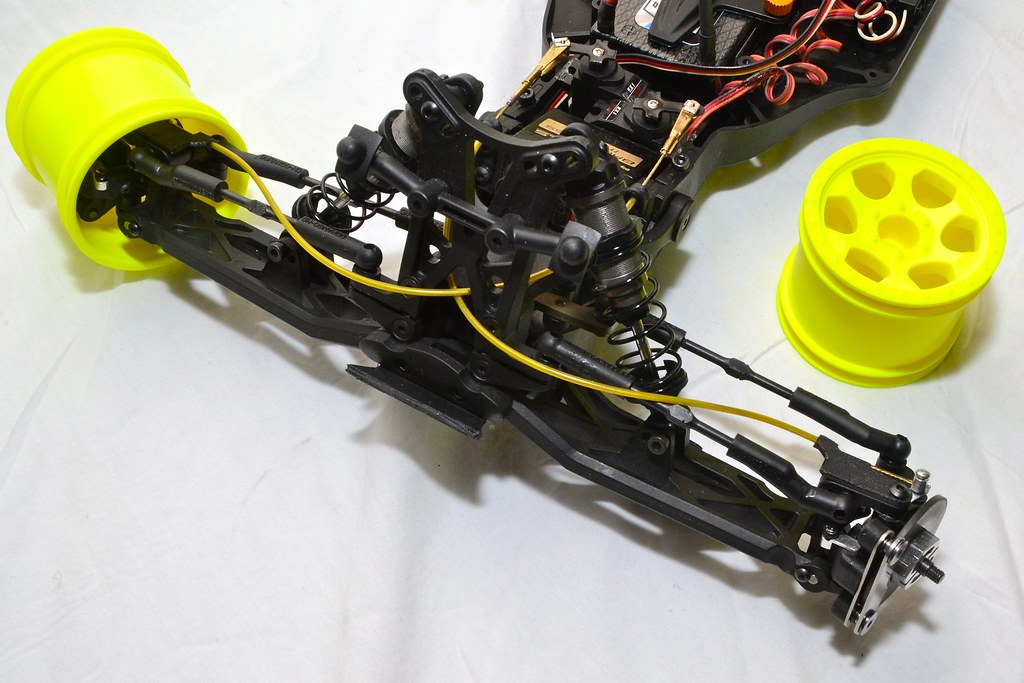
Turns out the Durango almost seemed like it was meant to have another servo or two in it. Well ok, not really but the servos I happen to have almost fit perfectly. Yes, I said two servos! I am using a Futaba 4PK to control my Durango which is a 4 channel controller that also has a menu to use the third and fourth channels to control brakes which automatically mixes those with channel 2 which is the throttle/rear brake. I was not sure if the servos would be strong enough for the job but I knew they would at least do something. I also did some research and found some other servos the same size with more than twice the torque so If I needed more power there was an option. It also turns out that there is plenty of room out by the steering spindle, C-hub, and inside the wheel to add some kind of brake caliper. The hex drive on the axle was also spaced away from the spindle which gave plenty of room for a deeper hex drive so I could make the brake disk float on the hex similar to 1/8th scale nitro cars.
I chose to use two servos so the left and right front brakes are controlled by their own servo thus allowing me to adjust left and right brake bias from the controller. The controller also allows me to mix the brakes into the steering. When going straight both wheels would get maximum braking force but as the wheels are turned the controller will reduce the braking force of the inside wheel to keep it from locking up. And since the front brakes are on separate channels from the rear brake I would have front and rear brake bias control too. All from the controller!
I hadn’t started making anything yet when I was talking to a co-worker about my idea. At the end of our conversation I mentioned that I wish I had a mill because making these parts with just my drill press, a Dremel, and some hand tools was going to be a pain. My co-worker mentioned a place called Sector67. He said it’s kinda like a co-op place for making things. The very next day I went to Sector67 and got a tour and the run down of what the place is about. It’s a hackerspace/makerspace. They have all kinds of tools and machinery to make just about anything including a mill and a lathe both of which I knew I would need. They also have 3D printers which turned out to be an invaluable tool for this project.
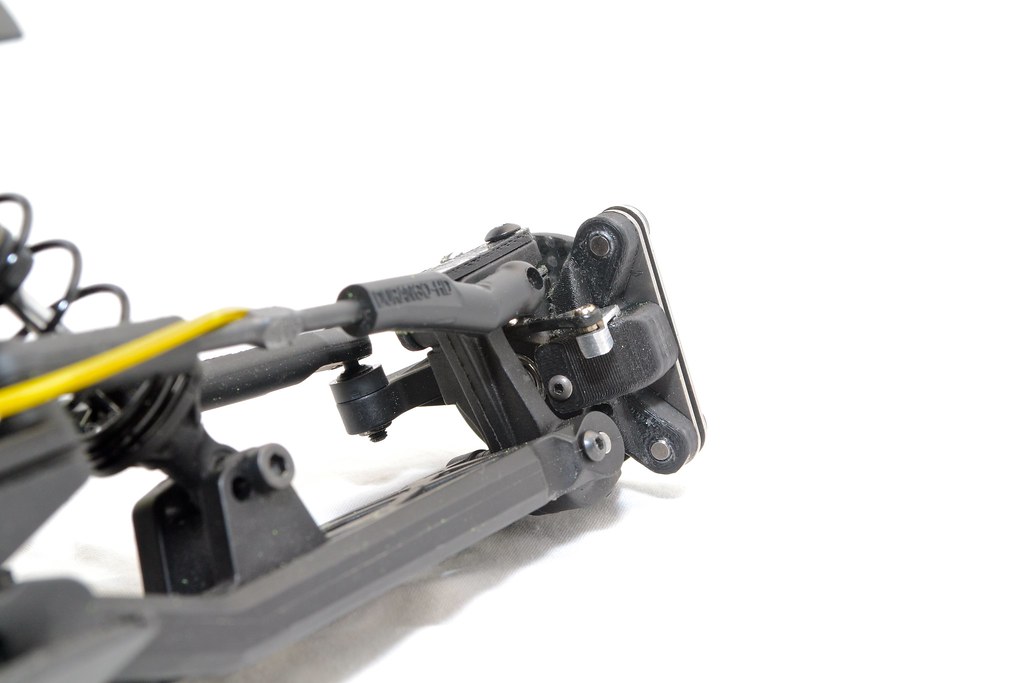
I bought the cable that I thought might work and started coming up with ideas based on how flexible the cable was or wasn’t. It soon became apparent that the cable was probably going to have too much drag at the extreme turning angles that the steering spindles normally go thru. I had to find a way around this. My best friend had the idea that the cable would pull a lever that rotates on the same axis as the spindle that way the cable only has to move up and down with the suspension. Problem with that was the brakes would engage more and more as you turn the wheels. After about a week of coming up with other ideas and trying to find a more flexible cable it dawned on me. The 4PK has the channel mixing I needed to make my friends idea work. It was however a more complicated design than I should be doing but I had to try it.
At some point I went back into Sector67 to ask some questions about my project. During that conversation it was mentioned that I should print some of my parts on the 3D printer and that they also have Solidworks (3D drawing software) that I could learn to design my parts with. The 3D printer prints ABS plastic which is the same plastic used in plastic model kits. I didn’t think it was going to be strong enough but I could at least have exact size parts in hand to test fit things. So I started to learn Solidworks and by the 5th day of learning and drawing I was ready to print my first part. The main brake caliper body. It took 12 minutes to print the part and when it was done I was shocked! The part was strong enough for the job! It was going to need some changes to minimize some flex and to fix some other errors I made but I could use this instead of machining a harder plastic which would take way more that 12 minutes to make.
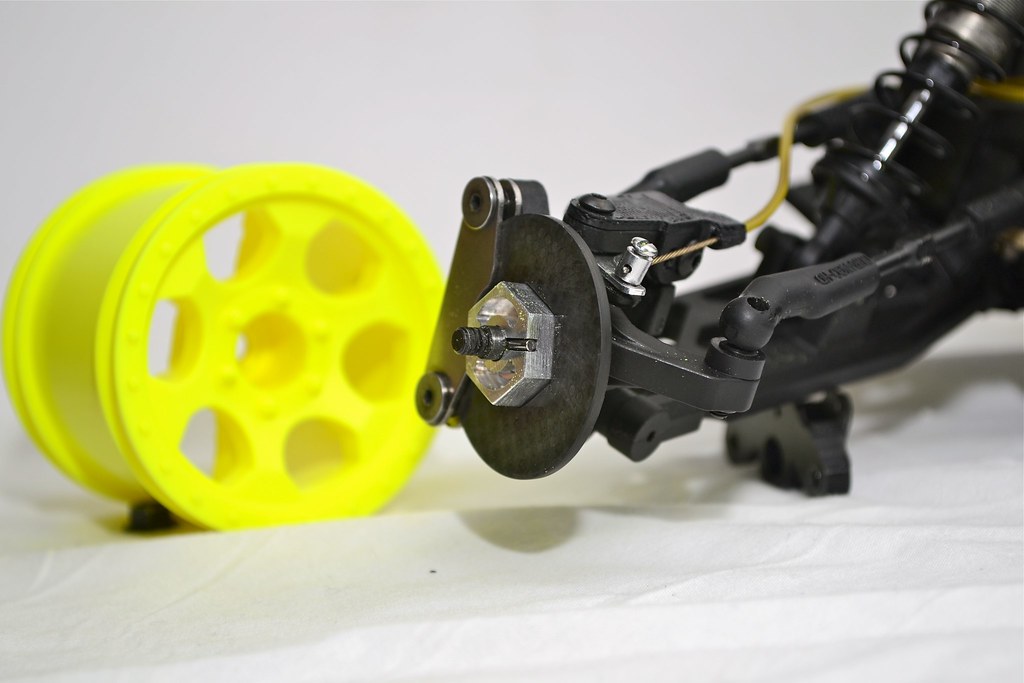
Early on I robbed the brake pads out of my 1/8th scale nitro buggy and thought they would be perfect but the shoulder screws were not going to even be close to the right size. Sourcing the correct shoulder screws slowed me down a few days till I discovered I already had what I needed on that same car in the form of the steering rack bolts. Although they had a half a millimeter larger thread than what I wanted they were perfect! A slight change to the caliper body and that larger thread was taken care of no problem. I also had some 2mm thick carbon fiber sheet laying around and thought that might be just the size I needed for the brake disk.
I spent about another month designing, printing, re-designing, re-printing, machining, and re-machining(oops!) the rest of the 9 parts per side. That only includes the parts that I made from scratch. Once one side was done and looked like it was going to work well it only took another week to get the parts made for the other side.
I wanted to change or modify the trucks existing parts as little as possible so I used existing holes to mount some of the new parts. The steering spindles are the only parts that needed a couple modifications and I had to make my own hex drives. For now the servos are just held in with servo tape and Shoe Goo. I may make servo mounts in the near future. The main caliper body is fastened to the steering spindle with a screw.

So how well does it work? So far I’ve only raced it one weekend and they did work ok. This is the first time I’ve used carbon fiber for a brake disk on anything and from my research they are kinda soft till they break-in. As I mentioned earlier, there are stronger servos I can try but I’m going to hold off on that till I try other ideas first. The servos I used are only about $10 each and the stronger ones are 3 times that.
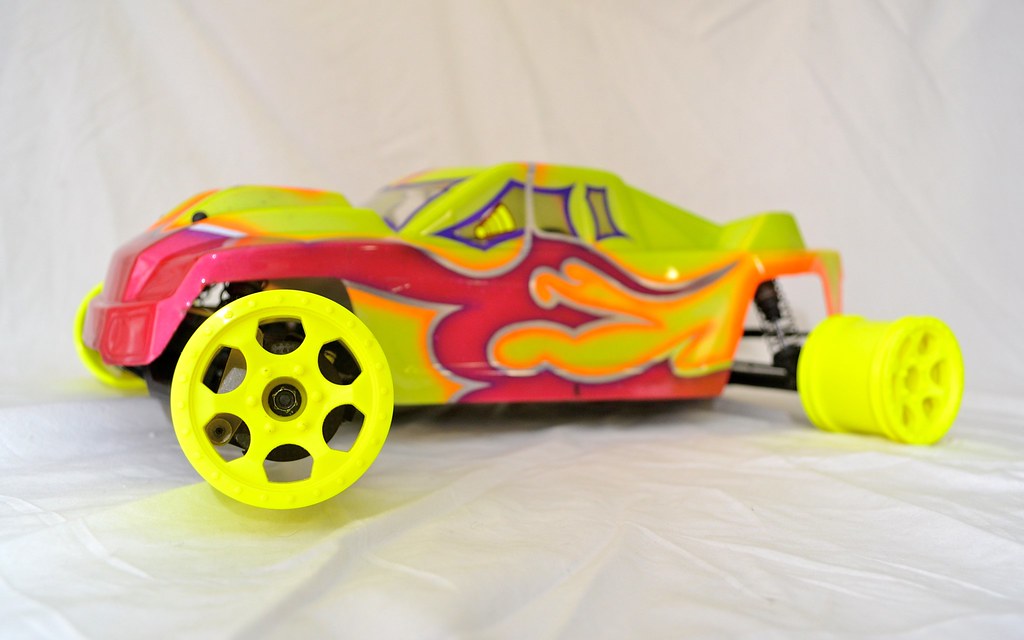
Yes, it did add a bunch of weight. The servos are 9 grams each. The weight added to each C-hub and steering spindle is about 16 grams. Surprisingly, I liked the added weight on the front. The truck seemed to carve the corners better but it did nose dive off the jumps more. I guess it’s time to put a spoiler back on.
Big thanks to Sector67 for the wonderful space and all the help it’s owner and members provided, to the co-worker who told me about Sector67, and to my friend Bob Kendall for helping with some design ideas and taking the pictures.
Time to start the next project!


 Eng / Usd
 Français
 Deutsch
 Italiano


Recent comments