ADVERTISEMENT | ADVERTISE WITH US
ADVERTISEMENT | ADVERTISE WITH US

By Aaron Waldron
LiveRC.com
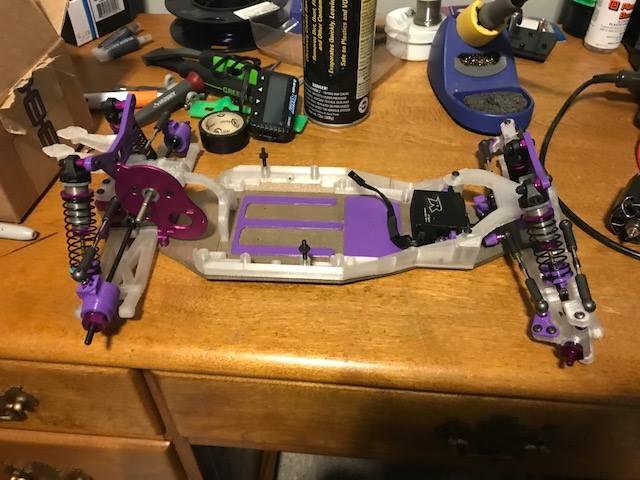
For her senior project at Utica Center for Science and Industry, Brooke Sasinowski created two B6D models using 3D printing processes - including one that's actually operational! The Team Associated- and Reedy-sponsored driver from Michigan customized the car with different colors, etched her name and the B6D logo on the bottom, and even wired up a mock ESC with LED for the static model. Check it out!
From Brooke Sasinowski (via Facebook):
www.facebook.com/brookesasinowskirc/
For my final project I wanted to create something more advanced than my last year final project of a miniature B44.3.
I started this project in December and it wasn’t going to be due until the end of the school year being in May. My goal of this project was to create a running 3D printed car. After printing a chassis in PLA, I decided I wanted to take the project further and create 2 cars, one being a model and one fully functional.
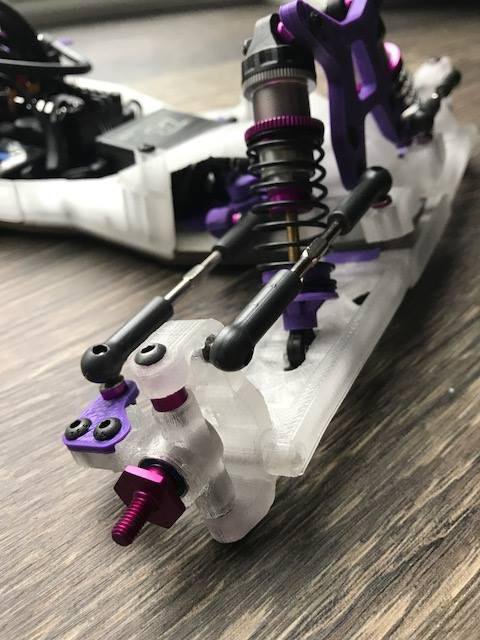
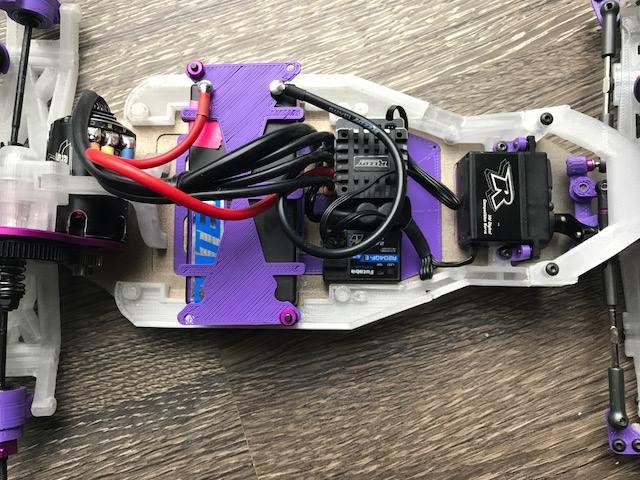
The PLA chassis car served as my “Testing Car.” It is made in different colored PLA along with semi-clear PLA. Everything on it was 3D printed except for turnbuckles, shock eyelets, shock shafts, bearings, dog bones, hexes, and screws. (Yes, the gearbox and shock bodies were 3D printed) I 3D printed electronics and created a circuit inside to turn on a LED on the ESC. The total for the car was about $214. It cost about $50 in 3D printed material using SolidWorks default material and excluding support. None of the cost included the parts used from the kit.
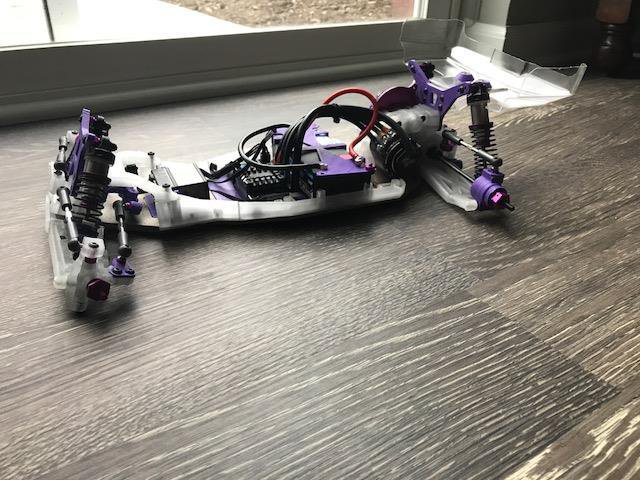
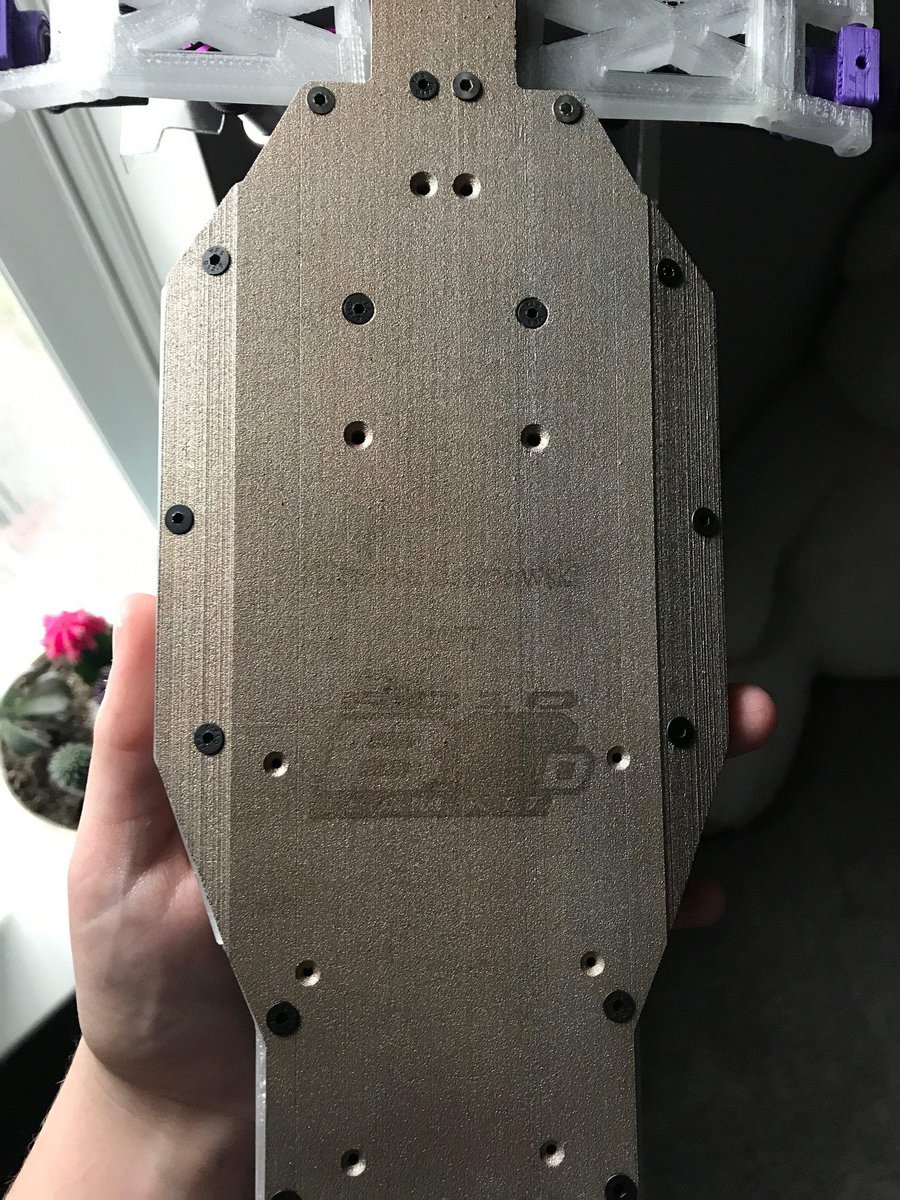
Now to the metal 3D Printed Car. After editing some of the features of my B6D chassis in Solidworks, I sent it to ExOne, to be 3D printed in a powder of Stainless Steel: Alloy 420 and Bronze: 90% Cu / 10% Sn and then it got a zirblast finish. Then after some research, I came to the conclusion of using High Temperature (HT) clear 3D printing material along with a purple PolyLite PLA. With some research on the HT material, I saw that it had the possibility to be as clear as glass and my goal was to achieve that state. It held up the process of the project from the testing needed and the final settings made it print 20mm/s slower adding hours to each part. Some of the parts on the final product were left in aluminum to maintain durability. I originally had the idea of programming a Raspberry Pi to act as the esc in the car but due to time constraints I was not able to do so. The car was finished with Reedy electronics. The chassis was also laser etched with my name, year, and the B6D logo. The total was $514 without electronics. The clear and purple material used was $12.
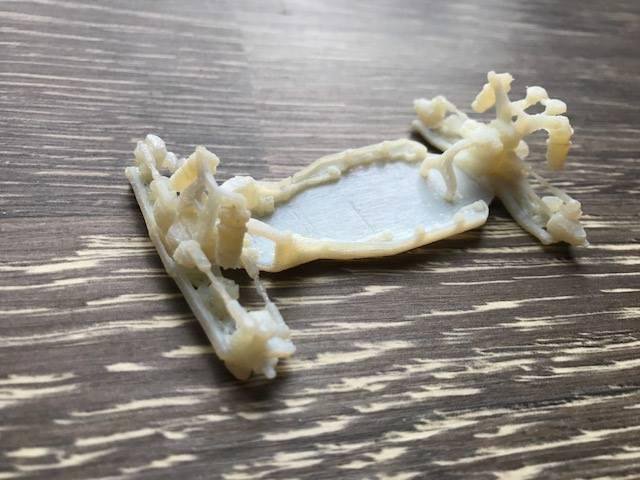
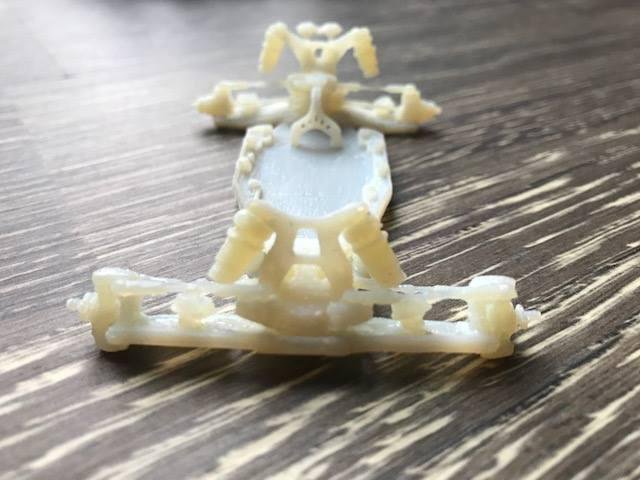
I also got a chance to print the assembly of the final car on our industrial printer shrunk down 25% as shown and also have a 50% model being printed.
In my 50 tab binder I included: All the dates of completion when drawing the parts for the testing car. The drawings for every part in the testing car along with all the updated drawings of the final one. Also all the material research and the cost analysis.
I’d like to thank everyone that made this project experience possible.
And also all my racing friends and family for keeping me motivated over the 6 months to produce a stunning final project


ADVERTISEMENT | ADVERTISE WITH US
 Eng / Usd
 Français
 Deutsch
 Italiano


Recent comments